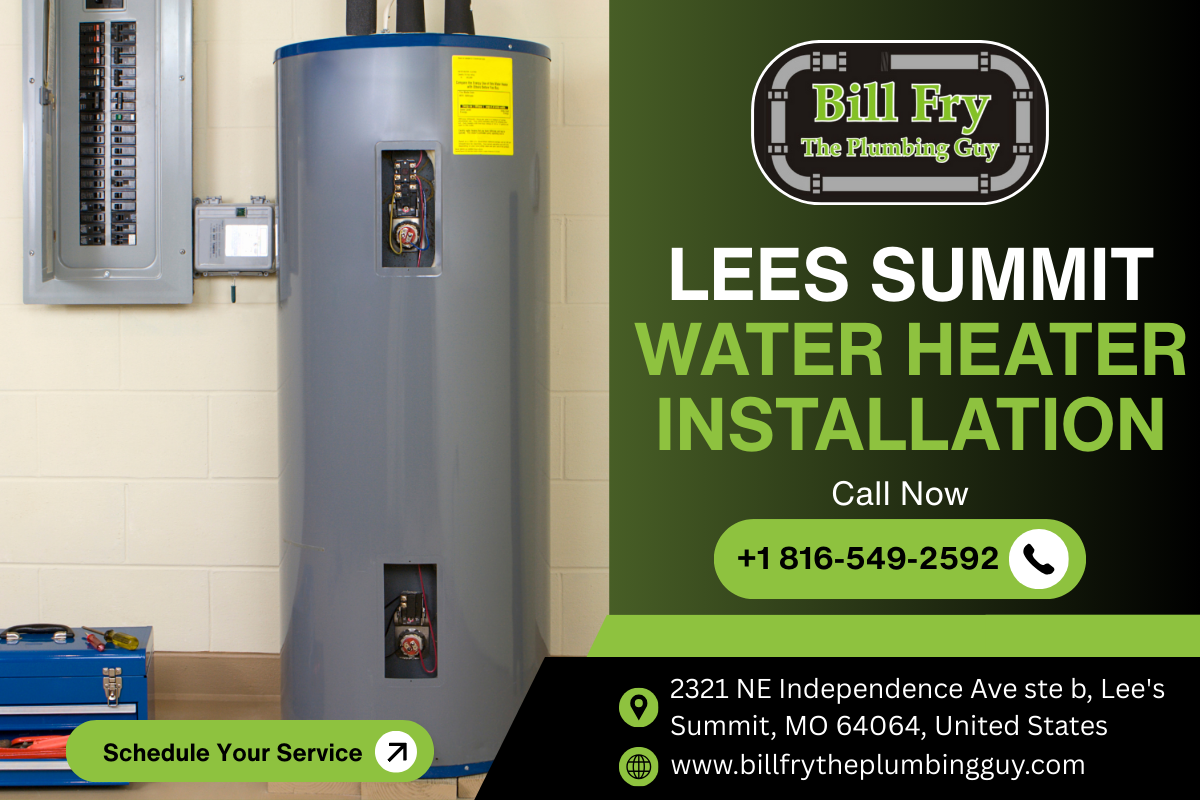
When people picture a water heater installation, they see a plumber wheeling in a tank, swapping a few pipes, and rolling out within an hour. Sometimes it goes that smoothly. Often it doesn’t, and the difference is preparation. A couple hours of upfront work can shave hundreds off the bill, prevent surprise delays, and keep your home safe. I’ve seen homeowners do this well, and I’ve seen the opposite—like the tight basement stairwell we discovered was a half-inch too narrow for the 50-gallon tank, or the gas shutoff that hadn’t been exercised in a decade and refused to close. Preparation turned those potential day-enders into minor hiccups.
This guide walks you through what matters before the truck pulls up: evaluating your old unit, choosing the right replacement, clearing the work area, lining up code and permits, and anticipating the little things that derail an otherwise simple job. While the principles apply anywhere, I’ll point out regional quirks I’ve encountered in and around Lee’s Summit, where homes span mid-century basements and newer slab-on-grade layouts, and where local inspectors have their own rhythm and expectations. If you’re scheduling a water heater installation in Lee’s Summit, the prep is the same, but the details—permit timing, venting rules, and utility access—deserve local attention.
Get clear on what you’re replacing and why
Water heaters fail in a few predictable ways. Tanks usually announce their exit with puddles or a rusty weep that worsens quickly. Gas units can go out intermittently due to a failing thermocouple or control valve. Electric models lose one heating element, so they produce lukewarm water and then quit altogether. Tankless units don’t give much warning; they start throwing error codes, especially after scale builds up. The root cause matters because it shapes what you replace and how you prepare.
If your tank has ruptured, you’re doing a straight water heater replacement. If you’re upgrading to a larger tank or jumping to tankless, you’re changing the plumbing, venting, and possibly the gas or electrical service. Those changes require more planning. I ask homeowners two simple questions: how often do you run out of hot water, and what’s changing in your household? New baby, in-laws moving in, a basement shower going live—these change the calculus. A 40-gallon tank that was fine last year may not cut it now.
In Lee’s Summit, many existing gas tanks vent into a masonry chimney or a B-vent that’s sized for an older furnace and water heater combined. If the furnace has been upgraded to a high-efficiency model that side-vents, that old chimney can over-draft or under-draft when it’s serving only the water heater. That’s the kind of detail I like to assess before the appointment, because correcting the vent could be as simple as resizing a connector or as involved as installing a new dedicated vent.
Pick the right replacement with your constraints in mind
Every brand has its fans. What matters most in practice: recovery rate, first-hour rating, venting type, footprint, and serviceability. For a standard tank, a 40-gallon gas model with a 38,000–40,000 BTU burner is common. If you’re tired of lukewarm back-to-back showers, bumping to 50 gallons or opting for a higher input burner helps more than most people expect. Electric tanks hinge on available amperage and recovery time; in homes with 100-amp service, a big jump may not be practical without a panel upgrade.
Tankless units are terrific when they’re sized, installed, and maintained correctly. They can run a shower and dishwasher simultaneously, but continuous hot water does not mean infinite hot water for every fixture at once. The real-world flow depends on your groundwater temperature—colder months in Missouri can drop incoming water into the 40s, which cuts the unit’s maximum hot-water flow. If you’re considering tankless in Lee’s Summit, check gas supply sizing: many tankless units want 150,000–199,000 BTU at full fire, which outstrips the ½-inch gas line serving an old 40,000 BTU tank. If a tankless water heater repair has been your routine lately—frequent error codes, ignition failures—the cause may be scale or undersized gas rather than the unit itself. Fixing those is part of proper preparation.
For hybrid heat pump water heaters, headroom and ambient temperature matter. They like a larger mechanical room or garage and produce a faint hum and cool the surrounding air. Great for energy savings, not ideal for a tight, finished closet or a cold basement corner.
A quick rule: choose the simplest option that meets your needs for the next ten years. Upgrades are great when they’re planned, not improvised on install day.
Confirm the utilities and clearances
Serviceability is what keeps a future water heater service visit quick and inexpensive. Before installation day, verify that the space meets basic needs:
- Clear a working path at least 24 inches wide from the entry to the water heater and a three-foot radius around the unit if possible. Move storage totes, shop vacs, and holiday decorations. Installers won’t stack your belongings or guess which boxes can be shifted. Check the shutoffs. The cold-water shutoff at the heater should turn easily. If it doesn’t, a replacement valve should be part of the scope. For gas, the shutoff should be accessible and operable. For electric units, identify the breaker and make sure it’s labeled. Measure the space. Height under joists, door widths, and stairwell turns all matter. A standard 50-gallon tank stands roughly 59–62 inches tall without fittings and is about 20–24 inches in diameter. If your current unit barely clears a low joist or platform, let your installer know. Confirm drain access. Plan where the discharge from the temperature and pressure relief valve will go. In some basements, that means a floor drain; in others, a condensate pump or drain line needs to be installed.
I’ve lost time on jobs because a 50-gallon tank wouldn’t clear a basement beam by half an inch. We solved it by switching to a short model that was a few inches shorter with the same capacity. That solution exists, but only if you measure ahead of time.
Understand permit, code, and inspection expectations
Local codes are not suggestions, and water heaters sit at the intersection of plumbing, gas, electrical, and mechanical rules. In many municipalities around Lee’s Summit, residential water heater replacement requires a permit and an inspection, even for same-kind swaps. The permit fee is modest compared to the cost of rework if an inspector flags issues after the fact.
Expect these common code requirements:
- Proper venting and draft for gas units, with minimum slope and correct connector size. Combustion air openings if the unit draws from the room, or a sealed combustion/direct vent model if the room is tight. Earthquake straps where required, though the Midwest is more forgiving than the West Coast; verify local rules. A full-port cold-water shutoff valve and a properly sized thermal expansion tank on closed systems. Many homes with modern pressure regulators or backflow preventers count as closed systems. Expansion tanks are not an upsell; they protect the tank, the lines, and fixtures. Temperature and pressure relief valve piped to an approved termination. No threads on the end, no upward loops, full-size pipe. Drain pan and drain line when the unit is in or above a finished space.
If you’re coordinating water heater installation in Lee’s Summit, ask your contractor whether they pull the permit and schedule the inspection. Reputable companies do. It keeps liability clear and saves you a drive to city hall. Some utility rebates also require proof of permit and inspection, especially for high-efficiency or heat pump units.
Plan water and hot water downtime
Most straightforward replacements take two to four hours once work begins, not counting permit scheduling or trips for oddball parts. Tankless conversions or relocations can stretch to a full day, especially if gas lines are being upsized or vent penetrations are needed. If you work from home, plan a water-free block. If you have kids, run a load of dishes and laundry the night before and set aside some drinking water. Heat a kettle for sponge baths if you absolutely need a midday cleanup.
Set expectations for the temperature of your water the first evening. New tanks can carry a factory default that’s lower than your preferred setting. Give it an hour after fill and fire to stabilize, then test and adjust. For tankless, you’ll likely see a digital setpoint. Most households land in the 120–125°F range. Higher temperatures boost capacity through mixing but raise scald risk. If you have elderly family or young children, 120°F is a sensible ceiling.
Make decisions about gas, venting, and electricity before the truck rolls
Here is where costs creep if choices aren’t made upfront. Gas line sizing and routing are the number one surprise on tankless jobs. If you are switching from a tank to a 199,000 BTU tankless, a ¾-inch or even 1-inch gas line may be required, depending on the run length, fittings, and supply pressure. That’s not a “maybe later” item. It’s the difference between a unit that lights reliably under a shower and one that throws error codes on cold mornings. If your goal is tankless water heater repair avoidance, this is the repair you do before you install.
For direct-vent units, think about vent termination. Where can You can find out more the intake and exhaust go without blowing onto a walkway, under an operable window, or onto a deck where people sit? The installation manual and local code will spell out clearances. You don’t want exhaust vapor frosting up a winter path or leaving streaks on a new siding job.
Electric upgrades are simpler to route but can hit a panel capacity wall. A 50-gallon electric tank typically needs a 30-amp, 240-volt circuit. A hybrid heat pump water heater’s electric draw is usually similar, but check the model. If your panel is already full or you’re sitting at 100 amps with a crowded house, talk through the options with your installer rather than discovering it at 9 a.m. on install day.
Protect your basement and finishes
If the old tank failed catastrophically, you may already be past this point. But even a controlled drain-down can surprise you. Sediment clogs drain valves all the time, especially on older tanks that haven’t been flushed. We sometimes have to pump from the top through the hot outlet, and that takes longer. Put down a path of rosin paper or drop cloths from the door to the utility area. Clear a staging spot near an exterior door if possible. If you have freshly painted stairs or a tight turn, let the crew know beforehand so they bring skid boards and extra hands.
If your heater sits in a closet over living space, a pan with a drain is not optional. If a gravity drain is impossible, a leak-sensor alarm is a smart backup and costs a fraction of a ceiling repair. I carry a few simple puck sensors on the truck for this reason. For slab-on-grade homes, think about where a relief valve discharge would go during a failure; an ugly but functional floor drain beats a mystery flow across a finished hallway.
Align on scope and parts to avoid mid-job surprises
A thorough estimate should spell out the model, capacity, venting approach, included valves, expansion tank if needed, pan and drain, gas flex, and disposal of the old unit. Ask about reuse vs replacement for certain items. I prefer to replace flexible gas connectors and water flex lines during a water heater installation rather than salvage old ones; it’s cheap insurance. If your budget is tight, prioritize safety and code items over cosmetic touches. A neat job with new valves and proper support will last longer than a shiny jacketed tank with reused, kinked connectors.
If you’re scheduling water heater service in Lee’s Summit or anywhere nearby, ask whether your home’s water pressure will be checked. High static pressure (over 80 psi) shortens the life of every fixture and appliance. If the pressure is high, this is the moment to discuss a regulator. It’s easier to install while the system is already being worked on, and it prevents callbacks that masquerade as water heater problems.
Prepare for tankless specifics: flushing ports, condensate, and scale
A good tankless installation includes isolation valves with service ports for descaling. If they’re not on the proposal, ask for them. Annual or biannual flushing is part of tankless water heater maintenance, particularly with hard water. Lee’s Summit water often runs moderately hard, and I’ve seen tankless heat exchangers scale up within two to three years if neglected. For homes without a softener, I recommend a flushing schedule and a simple sediment filter on the cold feed. If you already need tankless water heater repair in Lee’s Summit—especially ignition or overheat codes—scale buildup is a usual suspect.
Condensing tankless and high-efficiency tanks produce acidic condensate that must be neutralized before it hits a drain. A condensate neutralizer isn’t fancy—just a cartridge with limestone media—but it’s essential. Plan the route for that condensate line to a floor drain or pump. If your utility room is far from a drain, add the pump to the scope so no one is guessing later.
Safety checks you can do before the appointment
You don’t need a license to look for red flags. Put eyes and hands on a few items:
- Smell for gas near the water heater. If you catch a sulfur odor, call the gas utility or your contractor right away and ventilate. Don’t wait for installation day. Look at the flue pipe on a gas tank. White streaks or rust at the draft hood can signal backdrafting. Soot stains on top of the unit are another clue. Note it and mention it; the installer will check draft after the swap. Scan for corrosion. Green or crusty buildup around the cold or hot connections suggests slow leaks. If there’s active dripping, place a bucket and let your installer know. Minor leaks can become major when you start wrenching. Test the T&P lever briefly to ensure it isn’t seized. A stuck valve must be replaced. Identify the main water shutoff in case something goes sideways during prep or the appointment. Make sure you can reach it without moving furniture.
These steps don’t fix anything, but they give your installer a head start in planning materials and sequence.
What to expect during the appointment
A pro will shut off utilities, drain the tank (or pump if the drain valve is silted up), disconnect services, and haul the old unit. They’ll assemble the new unit with dielectric unions or approved connectors, new ball valve, expansion tank if applicable, and properly support the vent. Gas connections get leak-checked with solution and then with a pressure test if required locally. Electric connections are torqued to spec. For direct-vent or tankless units, wall penetrations are sealed and pitched to shed water.
Before relighting or energizing, the system is filled and purged of air. On gas units, a draft test confirms the flue is pulling. On electric, both elements are checked. On tankless, commissioning mode walks through flow and firing rates, and error codes are cleared. A tidy installer will wipe down the new tank, label shutoffs, and place the manual somewhere obvious. If your contractor offers water heater maintenance plans, this is when they’ll explain what it includes—typically annual checks of anode, flushes, and safety valve operation.
In Lee’s Summit, if a permit is in play, expect a brief inspection visit within a day or two. Inspectors look for venting, expansion control, relief valve discharge, and combustion air. If the job is neat and to code, the sign-off is quick.
Aftercare: new-owner checklist for the first week
The first hours and days are when small issues show themselves. A few drops at a threaded joint after first heat-up, a faint whiff of gas from pipe dope that lingers an hour, or a sweating cold line on a humid day—it’s good to know what’s normal and what isn’t. Take five minutes to:
- Run a hand under each connection while the tank is hot. A damp fingertip is worth noting. Tighten or call; do not ignore an active drip. Check the expansion tank. Tap high and low; it should sound different, with air on top and water below. If the whole thing rings solid, have the pressure checked. Verify temperature at a nearby tap. You’re aiming for stable, not scalding. A basic thermometer reading around 120°F is appropriate for most households. For tankless, trigger hot water at a low-flow fixture and a high-flow fixture. The unit should fire reliably in both cases. If it hunts or shuts off on low flow, ask about minimum flow programming or aerator changes.
If your contractor offers water heater service in Lee’s Summit, set a reminder for the first maintenance visit. Tanks benefit from a brief flush annually to remove sediment and a check of the anode after three to five years, especially in homes with softened water. Tankless units benefit from a descaling flush and screen cleaning.
Special cases that deserve extra planning
Some homes aren’t textbook. Here are situations where I advise more prep or a site check:
- Tight closets and attics. Attic installs raise spill and service risks. Factor in a larger pan, leak alarm, and easy access. In very hot attics, heat pump water heaters are actually happy; tanks are indifferent; techs are less so. Shared vents with legacy appliances. If the water heater and an old atmospheric furnace share a flue, verify compatibility. Replacing one appliance may require resizing the vent. Old galvanized water lines. The moment you touch them, they crumble. Budget a short repipe near the heater with copper or PEX and proper transitions. Well systems with pressure swings. Install a check valve strategy and expansion control so the heater doesn’t become the “shock absorber” for the plumbing. Repeated tankless error codes. Before replacing a unit that’s only a few years old, evaluate for scale, gas supply, and venting. Tankless water heater repair can restore years of life if the core is sound.
Budgeting with eyes open
The internet loves tidy ranges. Real costs depend on local labor, permit fees, and scope. In the Midwest, a straightforward 40- or 50-gallon atmospheric gas replacement often lands in the mid hundreds to low thousands, including haul-away and basic materials. Add for expansion tank, pan and drain, and vent adjustments. High-efficiency tanks and power vent models cost more, largely due to venting and controls. Tankless water heater installations run higher because of gas line and vent work; the unit cost also jumps. If you see a price that seems too good, ask what’s excluded. If a quote seems high, ask it to be itemized. A transparent estimate reduces friction on install day.
Homeowners sometimes ask whether maintaining an old unit is cheaper than replacing it. A water heater maintenance visit is inexpensive compared to the damage from a split seam. If the tank is over ten years old and shows rust or damp insulation at the base, maintenance won’t buy you much time. Put those dollars toward replacement. For tankless, ongoing maintenance is not optional; skipping it invites scale buildup, poor performance, and repairs that cost more than routine service would have.
A local note for Lee’s Summit homeowners
Lee’s Summit homes are a mix of older basements with masonry chimneys, newer developments with sealed combustion appliances, and plenty of finished lower levels where a leak can get expensive. If you’re planning a water heater installation in Lee’s Summit, ask your contractor about:
- Permit timing and inspection windows with the city, so you can plan access. Whether your home’s water pressure has been measured recently. Many subdivisions see pressures above 80 psi at night. Venting options if your furnace has already gone high-efficiency and abandoned the old flue. Availability of parts for your chosen brand should you ever need water heater service. Stock on common anode rods, control valves, and igniters matters when something fails on a holiday weekend. For tankless water heater repair in Lee’s Summit, who handles warranty parts and how quickly they can get them. A well-organized shop will have a kit for the popular models.
Local knowledge is worth more than a brand name. The best installers in your area know which inspectors are sticklers for expansion control, which neighborhoods hide high static gas pressure, and which vent terminations frost up in a cold snap.
A simple pre-appointment checklist you can finish in under an hour
- Clear a three-foot workspace around the heater and a 24-inch path to the door. Verify the cold-water and gas shutoffs operate; locate and label the breaker if electric. Measure height and access widths; note any tight turns or low beams. Identify a drain or route for pan and relief valve; plan for a condensate pump if needed. Gather model and age info from the old unit’s label; snap a photo to share with your installer.
The payoff for doing it right
A well-prepared water heater installation is quiet, orderly, and forgettable in the best way. Hot water returns when promised. No one makes three runs to the supply house. The inspector leaves a green sticker without debate. And when you do need help down the line—whether routine water heater maintenance, a quick water heater service call, or even a future upgrade—you’ll be starting from a clean, code-compliant baseline. That foundation saves time and money, especially if you’re in a busy service area like Lee’s Summit where lead times tighten during cold snaps.
Treat the appointment as a small project rather than a swap. It’s a couple hours of prep for a decade of reliable hot water. That trade has paid off for my customers more times than I can count, and it starts with the steps above.