A water heater rarely demands attention until a morning shower turns lukewarm or the basement smells faintly of gas. With a little routine care and a clear eye for warning signs, you can extend the life of the system, trim energy bills, and avoid the weekend emergency call. I’ve spent enough time in utility rooms to know the difference between a harmless rattle and a tank that’s one bad day from failure. This guide distills the tasks a homeowner can do, the red flags that call for a pro, and how to think about water heater installation or water heater replacement when repair no longer makes sense. For readers in or near Lee’s Summit, I’ll also note a few local considerations that come up during water heater service in this area.
Know What You’re Working With
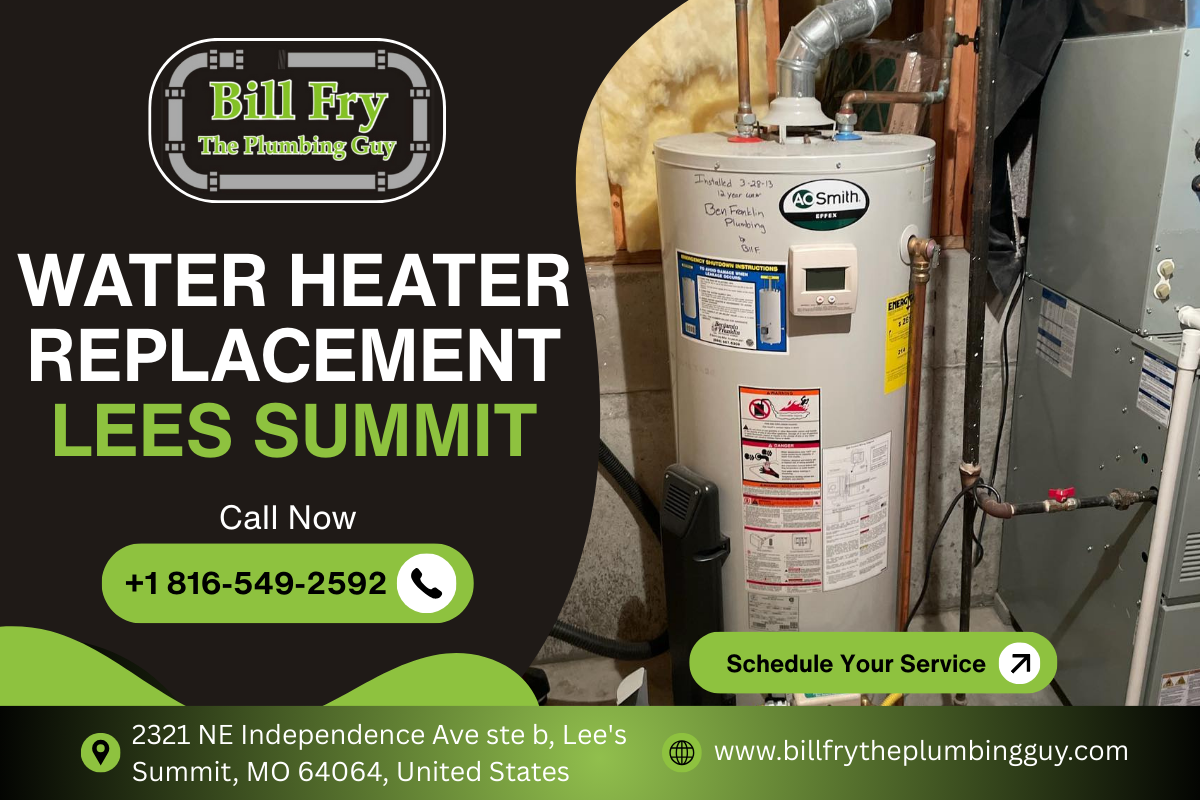
Start by identifying the type, fuel, age, and capacity of your heater. A conventional tank stores 30 to 80 gallons and keeps it hot. Tankless models heat on demand and take far less space but need clean water and regular flushing to maintain efficiency. Fuel sources include natural gas, propane, and electricity; each has distinct maintenance quirks. The nameplate on the unit lists the model and serial number; most manufacturers encode the date in the serial. If you can’t makes sense of it, search the brand’s date code format. Age matters. Most tanks last 8 to 12 years; tankless units often reach 15 to 20 when maintained.
Capacity shows up in daily comfort. A family of four with teenagers will challenge a 40‑gallon tank unless showers are staggered. Tankless units avoid storage loss but can struggle if multiple fixtures run at once, especially in colder months when incoming water temperature drops. In the Kansas City area, winter inlet temperatures can sink near 40 degrees Fahrenheit, which trims tankless flow rates substantially. Expect a 199,000 BTU unit to deliver roughly 4 to 5 gallons per minute at a 70‑degree rise under those conditions.
Understanding what you own helps you apply the right maintenance and set fair expectations. It also frames conversations about water heater installation, whether you’re upgrading capacity or moving from tank to tankless.
The Annual Visual Once-Over
I like to start with a quiet walkaround. Look at the floor for dampness, rust streaks, or dried mineral trails. Feel the tank sides for warmth; a hot tank wall often means insulation loss or a failing thermostat. Sniff for gas near a gas unit. Watch the burner flame through the sight glass. A healthy gas flame is mostly blue with a crisp, steady pattern. Lazy, yellow tips suggest incomplete combustion and merit service. On an electric unit, pull the access covers and look for charred wires or insulation that smells cooked.
Noise tells stories. Popping or rumbling under heat usually spells sediment. A light sizzling when the burner stops can be condensate or a small drip landing on hot surfaces. Sharp ticking often comes from expansion and contraction. Tankless units will buzz or whine under load, but harsh grinding from the fan or a rapid on‑off cycling points to scaling or flow sensor issues.
This five‑minute inspection won’t fix anything on its own, but it often catches small problems before they enter the expensive phase.
Safety Gear and Common-Sense Precautions
Don’t crack open a relief valve without eye protection. Wear gloves. Let the unit cool before you drain or flush anything. Turn off power at the breaker for electric heaters. For gas units, set the control to pilot or vacation if you’re just flushing a few gallons; shut off the gas valve if you’re dismantling anything more involved. Keep open flames and cigarettes away from gas appliances. If you smell strong gas, back out and call your utility or a licensed pro. It’s easy to become cavalier with equipment you see every day, but the rare mistakes hurt the worst.
Sediment: The Silent Efficiency Killer
If you live with hard water, sediment is not a question of if, but how much. Mineral scale and sand settle at the bottom of tanks and bake into a concrete-like layer that muffles heat transfer, water heater service makes the burner work longer, and eats the base of electric elements. I’ve drained first-time flushes that looked like milkshakes.
On a conventional tank, once or twice a year, connect a garden hose to the drain valve and run it to a floor drain or outdoors. Open the valve and drain a few gallons with the cold supply open, then close the supply to let the tank rinse. Catch the flow in a white bucket once to see the level of solids. If it runs clear, you can stop. If it looks gritty, pulse the water supply on and off several times to stir and clear sediment. Avoid fully draining to bone dry unless you’re prepared to bleed air through the hot taps and relight pilots, as full drains can trap air pockets and knock minerals loose into the hot lines.
Tankless water heater repair and maintenance attack scale in a different way. Every tankless unit should have isolation valves. Shut off the cold and hot valves, connect a small pump and hoses to the service ports, and circulate a descaling solution such as food-grade white vinegar or a commercial descaler for 30 to 60 minutes. Rinse thoroughly afterward. Many homeowners skip this step for years, then call when the unit starts error-coding under heavy demand. In my experience around Lee’s Summit, annual flushing is reasonable for hard water homes without softeners; with a good softener, every two years can suffice.
The Anode Rod: Your Tank’s Sacrificial Guardian
If you open only one fitting on a tank this year, make it the anode rod. This magnesium or aluminum rod sacrifices itself to corrosion so the tank walls don’t. When it’s gone, your tank becomes a steel buffet for oxygen and minerals.
Shut off the cold water supply, relieve pressure by opening a hot tap, then use a socket and breaker bar to back out the anode from the top. Some rods are under a plastic cap; others share space with hot or cold nipples. If the rod is down to bare wire or less than half its original diameter, replace it. Magnesium offers better protection and can reduce odor, but in very aggressive water aluminum-zinc alloy lasts longer. Rods can be rigid or segmented; segmented versions help in tight basements where you can’t lift a full-length rod. If you deal with stubborn rotten egg smell on hot water only, a powered anode can work wonders, though it costs more upfront.
I’ve seen tanks in the 14-year range that looked surprisingly clean inside simply because the owner stayed on top of anode replacements. It’s the single biggest life extender on a tank.
Temperature and Pressure Relief Valve: Nonnegotiable Safety
Every storage heater needs a T&P relief valve, usually on the side or top, with a discharge tube that ends close to the floor. This valve is your last line of defense against overpressure and scalding. Test it once a year by lifting the little lever briefly to ensure it snaps back and allows a quick gush. Place a small towel or bucket because you will get water. If it dribbles afterward or refuses to move, replace it. Replace any discharge tube that’s capped, threaded shut, or terminates above eye height. I still find improvised caps from previous owners trying to “fix” a drip. That turns a safety device into a bomb plug.
On tankless units, you still need relief in many jurisdictions, either at the unit or on the hot water distribution. Code varies, but the principle does not: relieve pressure safely to an approved location.
Temperature Settings, Scalding Risk, and Energy Use
There’s a tug-of-war between scald protection, energy savings, and bacterial control. Many homes are set at 120 degrees Fahrenheit, which is a good baseline for safety and energy. Healthcare and multi-unit facilities often aim higher because legionella thrives between 77 and 113 degrees. Residential tanks don’t require 140 degrees if the system is healthy and used regularly, but if anyone in the home has a compromised immune system, speak to your plumber about mixing valves that allow hotter storage with tempered delivery.
For gas tanks, the dial rarely gives precise numbers. Use a meat thermometer at a tap after running hot water for a minute. Adjust in small increments, then re-check. On electric units, both thermostats must match; power off before removing covers and adjusting.
Tankless units display setpoints. Start at 120 and adjust carefully if you need more heat for dishwashing or cold-season showers. Higher setpoints reduce available flow at a given temperature rise, especially noticeable in winter.
Gas and Combustion: Drafting, Venting, and Air Supply
I’ve been called to plenty of “no hot water” surprises that were nothing more than a waterlogged flue or a vent bird’s nest tripping a safety switch. Gas appliances need clean combustion air and unblocked vent paths. For atmospherically vented tanks, the draft hood on top should pull a strip of tissue toward the flue when the burner runs. Backdrafting will push exhaust into the room, often leaving soot or a warm plume you can feel with the back of your hand. If draft fails, do not ignore it. Check for blockages, recent remodels that tightened the room, or competing exhaust fans.
Power-vented tanks and tankless units use fans and PVC venting. Look for cracks, sagging runs with condensate pooling, and proper slope back to the unit where required. Replace brittle or yellowed PVC near tanks that run hot. If you smell fumes or see error codes related to combustion, that’s professional territory. Carbon monoxide is not a DIY learning curve.
Electrical Checks on Electric Heaters
Kill the breaker and verify with a non-contact tester. Remove the upper and lower element covers. Look for burned spade connectors, loose wires, and signs of moisture. Elements can be checked with an ohmmeter after disconnecting the wires: a typical 4500-watt element reads around 12 to 13 ohms at room temperature. Infinite resistance means an open element; zero means a short. Thermostats and high-limit resets can be tested and replaced if faulty, but make notes and photos before moving anything. If the high-limit trips repeatedly, that’s a symptom, not the cause; think sediment on elements, a stuck thermostat, or poor water flow.
Expansion Tanks and System Pressure
Closed plumbing systems with backflow prevention need an expansion tank. Otherwise, when water heats and expands, pressure spikes hammer valves and stress the tank. An expansion tank mounted above or near the heater should be pressurized to match your home’s static pressure. Check with a tire gauge on the Schrader valve when the system is depressurized. If water spurts from the valve, the bladder is ruptured and the tank needs replacement. In my experience, these fail in the 5 to 8-year window. They’re inexpensive insurance.
High municipal pressure is common in fast-growing areas, and parts of Lee’s Summit see pressure over 80 psi in certain neighborhoods. If hot and cold faucets spit or the T&P weeps intermittently, check pressure with a gauge that threads onto a hose bib. Add or adjust a pressure-reducing valve as needed.
Cleaning the Cold Side and Nipples
Dielectric nipples at the tank connections prevent galvanic corrosion, but they can clog with mineral flakes and rust over time, restricting flow. If hot water pressure slowly declines while cold is normal, the hot outlet, heat trap, or nipples could be the bottleneck. I’ve pulled nipples that looked like they spent a season in a cave. Replacing them during water heater service often restores full flow without chasing fixtures around the house.
Tankless Particulars: Filters, Flow Sensors, and Error Codes
Tankless water heater repair tends to be cleaner work but relies on attention to small components. Most units have an inlet screen filter. Close the isolation valves, relieve pressure, and pull the screen to rinse out sand and scale. Flow sensors gum up and cause erratic firing or lukewarm output. Cleaning these during a descaling cycle usually restores smooth response.
If your tankless short-cycles with small draws, add a small buffer tank or recirculation strategy. Many homeowners install tankless heaters during water heater installation to save space and fuel, then call months later about temperature swings during handwashing. It’s not a defect; it’s physics. Brief, low-flow uses can’t keep the burner engaged. Some models have “comfort” settings or internal recirc pumps that soften this behavior.
When Repair Gives Way to Replacement
Age, tank leaks, repeated element failures, and non-standard flues can push you toward water heater replacement. On a conventional tank that’s well past ten years with signs of corrosion at the bottom seam, replacement is cheaper than chasing leaks. If the burner assembly is rusted to the point where screws snap and gaskets crumble, you’re at the threshold already.
For tankless, if the heat exchanger is scaled beyond redemption or cracked, or if boards are obsolete and unavailable, replacement is rational. Look at your gas line size before you decide to go tankless; many standard installations need a larger gas line or a dedicated electrical circuit for power-vent models. In some existing homes, the vent route makes tankless less practical than a high-efficiency tank. Every site is a trade-off.
In Lee’s Summit, homes built in the early 2000s often have water heaters tucked into tight utility rooms with tricky vent paths. A thoughtful plan for water heater installation in Lee’s Summit accounts for combustion air, clearance to combustibles, and condensate routing for high-efficiency units during winter. Contractors familiar with local inspections save headaches at final sign-off.
Upgrades That Actually Pay
A few accessories earn their keep. A thermostatic mixing valve allows you to store hotter water and blend it down at the tap, increasing effective capacity without a bigger tank. A recirculation pump cuts wait times in sprawling homes, though it raises standby losses slightly; modern pumps with smart timers or temperature sensors minimize waste. Drain pans with piped drains protect finished spaces. For tankless users, isolation valve kits are non-negotiable if you want serviceability.
Water treatment matters. If your home’s hardness sits above about 8 grains per gallon, a softener dramatically reduces scaling. If you dislike softened water or only want to protect the heater, consider a dedicated conditioning system on the hot side or a scale-inhibiting media cartridge before the unit. I’ve seen tankless exchangers in softener-equipped homes look nearly new at year seven, while unprotected units needed aggressive descaling every season.
The Homeowner’s Short-Form Checklist
Use this as a once or twice yearly reference. If anything here feels beyond your comfort level, call for water heater service.
- Walkaround: look for leaks, rust trails, soot, and listen for rumbling or popping. Flush: drain a few gallons from a tank until clear; descale tankless with isolation valves. Safety checks: test the T&P valve, verify the discharge pipe, confirm combustion air and venting. Anode and expansion: inspect and replace the anode as needed; check expansion tank pressure. Settings and sensors: verify temperature, clean filters on tankless, and note any error codes.
Why Professional Service Still Matters
Plenty of owners handle flushing and anode replacement themselves. Where professionals earn their fee is in the pattern recognition and the borderline work that introduces risk: gas piping, vent design, control diagnostics, and code compliance. An experienced tech can trace a scald complaint to a failed mixing valve or a mysteriously short shower to a dislodged dip tube. During water heater maintenance, we also spot upstream issues like high pressure or cross connections that erode performance everywhere.
If you’re scheduling water heater service in Lee’s Summit, timing helps. Book shoulder seasons to avoid winter backlogs and to get full attention. If your unit is closing on its lifespan, ask for a quote on both tank and tankless options. Prices vary by brand and install complexity, but a straightforward replacement usually takes a few hours; adding a new vent route, relocating the heater, or upsizing a gas line can stretch into a day or two. A good contractor should explain those trade-offs clearly.
Installation Details That Separate Good From Great
Every clean installation I admire shares a few traits. The heater sits on a stable platform, with isolation valves placed for easy access, unions where future service needs it, and dielectric breaks at dissimilar metals. The vent runs are supported, sealed, and sloped correctly, with terminations that meet clearance rules. Combustion air paths aren’t afterthoughts. The drain pan is actually piped to a place that won’t ruin the first floor. The condensate neutralizer on a high-efficiency unit isn’t just a forgotten tube dripping acid into a floor drain.
Homeowners often ask whether to move the heater during a remodel. If headroom or service access is poor, the remodel is the time to fix it. During lees summit water heater installation, relocating a heater a few feet to avoid a future drywall demolition costs less than a late-stage chase for a hidden leak.
Troubleshooting Common Complaints
Lukewarm water under heavy use often points to sediment loss of effective capacity or a dip tube issue. On a tank the dip tube forces cold water to the bottom; a cracked tube dilutes hot with cold. Replacements are inexpensive. A sudden drop to barely warm on an electric heater likely means one element failed; the unit limps along on the other. On gas units, a dirty flame sensor or thermocouple can cause intermittent burner shutdowns. Clean or replace.
Smelly hot water is a classic. If cold water smells fine and hot smells like rotten eggs, bacteria interacting with the anode rod are likely culprits. A magnesium-to-aluminum-zinc anode swap, a shock chlorination, or a powered anode often cures it. If both hot and cold smell, treat the incoming water.
Noisy tankless behavior can be traced to scale, low gas pressure, or a dirty inlet screen. Tankless water heater repair frequently involves clearing those three items and updating firmware if the manufacturer provides it.
Budgeting: What Maintenance Really Costs
Parts pricing varies by brand, but as a ballpark: an anode rod runs 20 to 80 dollars for standard, 150 to 200 for powered. A T&P valve sits around 20 to 40. Expansion tanks are often 50 to 120, plus labor. Professional water heater maintenance with flushing, anode inspection, and combustion checks lands in the low hundreds depending on region. Neglect flips those numbers fast. A leaking tank and emergency water heater replacement can add overtime fees, drywall repairs, and floor damage that dwarf years of routine care.
Tankless servicing costs more per visit, but the interval can be longer with soft water. Expect 60 to 90 minutes for a thorough descale and inspection. If your home has very hard water and no treatment, budget annually.
A Note for Lee’s Summit Homeowners
Local water hardness, seasonal temperature swings, and code enforcement shape how I approach water heater service in Lee’s Summit. Many neighborhoods draw moderately hard water that justifies regular flushing and serious thought about a softener if you’re going tankless. Winters trim tankless capacity, so size with margin or consider a recirculation loop to maintain stable delivery. Inspectors here pay attention to vent terminations, seismic strapping on tanks where required, and proper discharge on relief lines. https://maps.app.goo.gl/G3vdEuCxh2kzesm3A If you search for water heater installation Lees Summit or water heater maintenance Lees Summit, look for contractors who ask about your home’s static pressure and gas meter capacity before they quote. That simple question separates a true installation plan from a price scribble.
For tankless water heater repair Lee’s Summit residents often call when a unit throws a code during holiday gatherings. That’s classic high-demand stress on a partially scaled exchanger. Proactive descaling in the fall prevents it, and technicians usually have the parts on hand if something else shows up.
The Long View: When Maintenance Becomes a Habit
Good maintenance habits save you from surprises, but they also make the system nicer to live with day to day. Shorter waits for hot water with a tuned recirculation loop. Quieter operation after sediment removal. Stable temperatures with a clean tankless flow sensor. Lower gas or electric bills because the heater isn’t wasting cycles fighting scale.
If you want the shortest version of a plan: look, listen, flush, test the safety, mind the anode, and don’t let small irregularities slide for months. Keep a simple log taped inside the utility room door. Jot dates, tasks, and parts used. When it’s time for water heater service, that log helps the technician pick up where you left off and make recommendations based on real history rather than guesswork.
When the day comes that replacement is smarter than repair, think holistically about your home and routines. A larger tank with a mixing valve might serve a growing family better than a minimally sized tankless. A tankless with recirculation might delight someone who hates waiting at the far bathroom. The right choice isn’t a brand or a buzzword; it’s a fit to how you live, installed cleanly and maintained with a light but steady hand.